How to Launch an Election
All elections created on Election Runner will start in the “Building” state (see: Election States) and will not start until the election administrator launches the election by going through the launch process. The launch process consists of 4 steps:
To start the election launch process, click on “Launch” on the election sidebar. Elections can only be launched if they’re in the “Building” state (see: Election States).
1. Confirm Election Details
The first step of the launch process is used to verify that the election’s details (title, dates, timezone, settings, etc.) are correct. Reference the permissions matrix to see which settings can modified once the election has been launched.
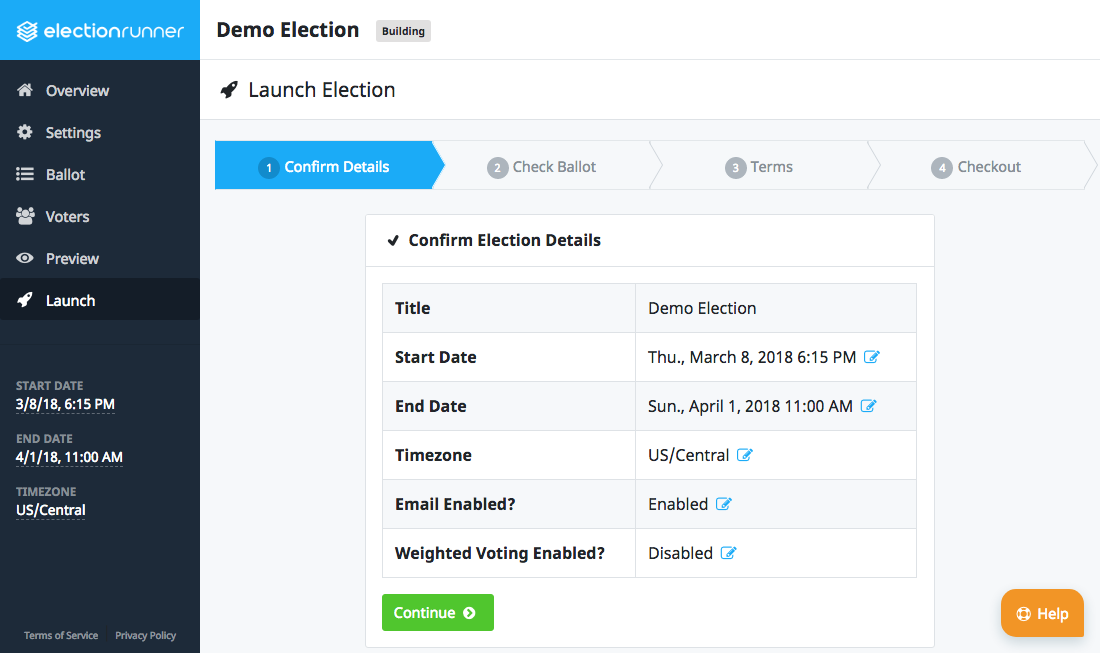
Launch Requirements
Elections must meet the following requirements before they can move to step 2 of the launch process.
- The ballot must have at least one question with at least one option.
- The election must have at least 1 voter.
- The election’s end date must be in the future.
- An account fewer than 5 free elections in the “Running” state (see: Election States).
Click “Continue” after verifying the election’s details and that the launch requirements have been met.
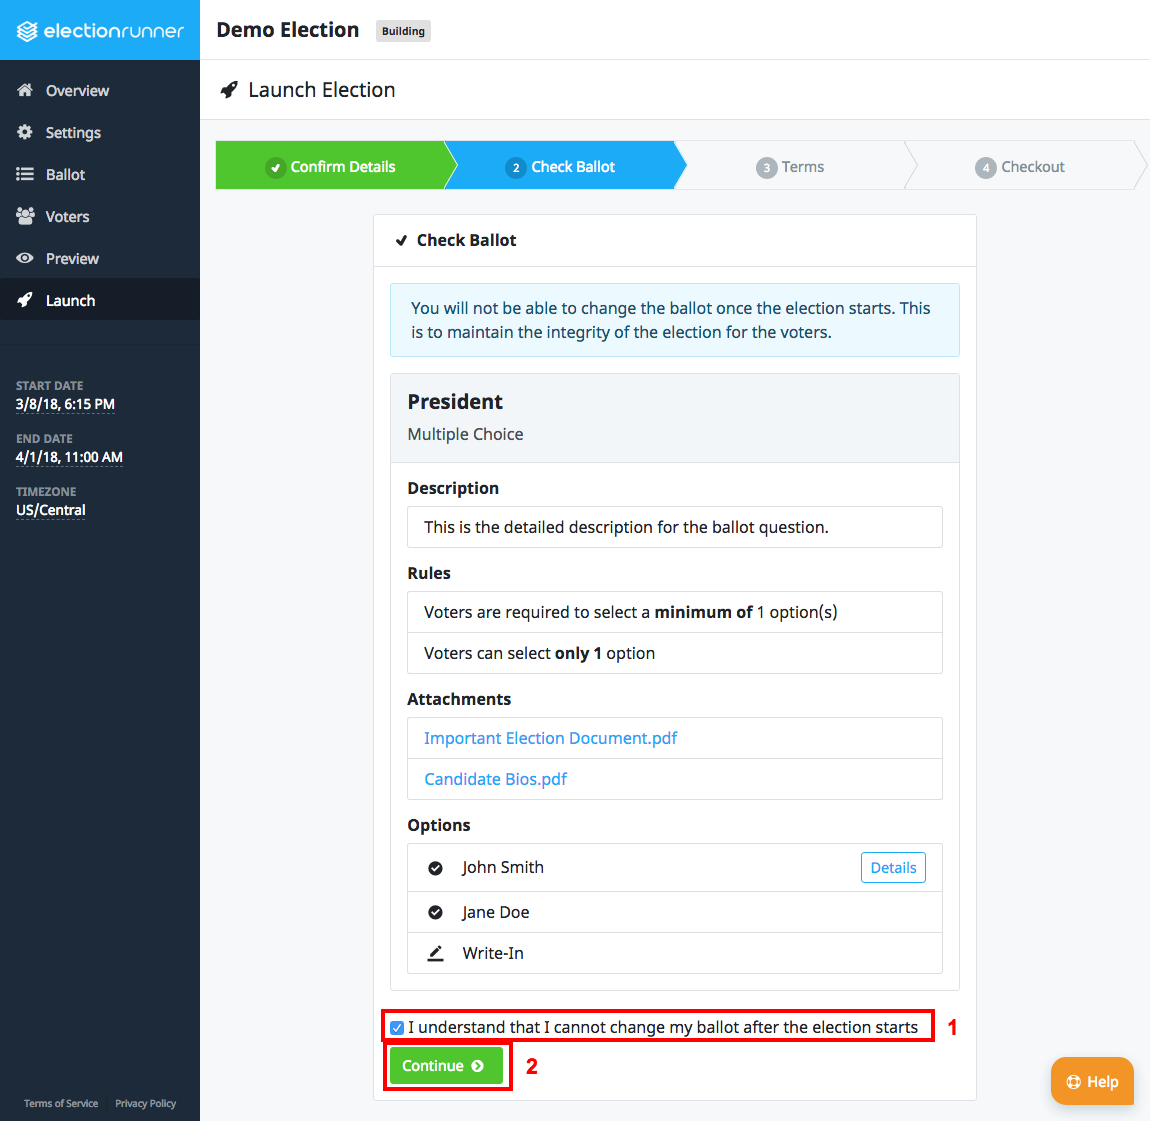
2. Check Election Ballot
Assuming the launch requirements have been met, the next step in the launch process requires that the election administrator confirms that the ballot is set up correctly. This step is crucial because the ballot of an election cannot be modified once the election has been launched. This is to protect the integrity of the election and no exceptions will be made (see: How to Modify the Ballot of a Running Election).
After verifying the ballot details, check the “I understand…” checkbox (1) and click “Continue” (2).
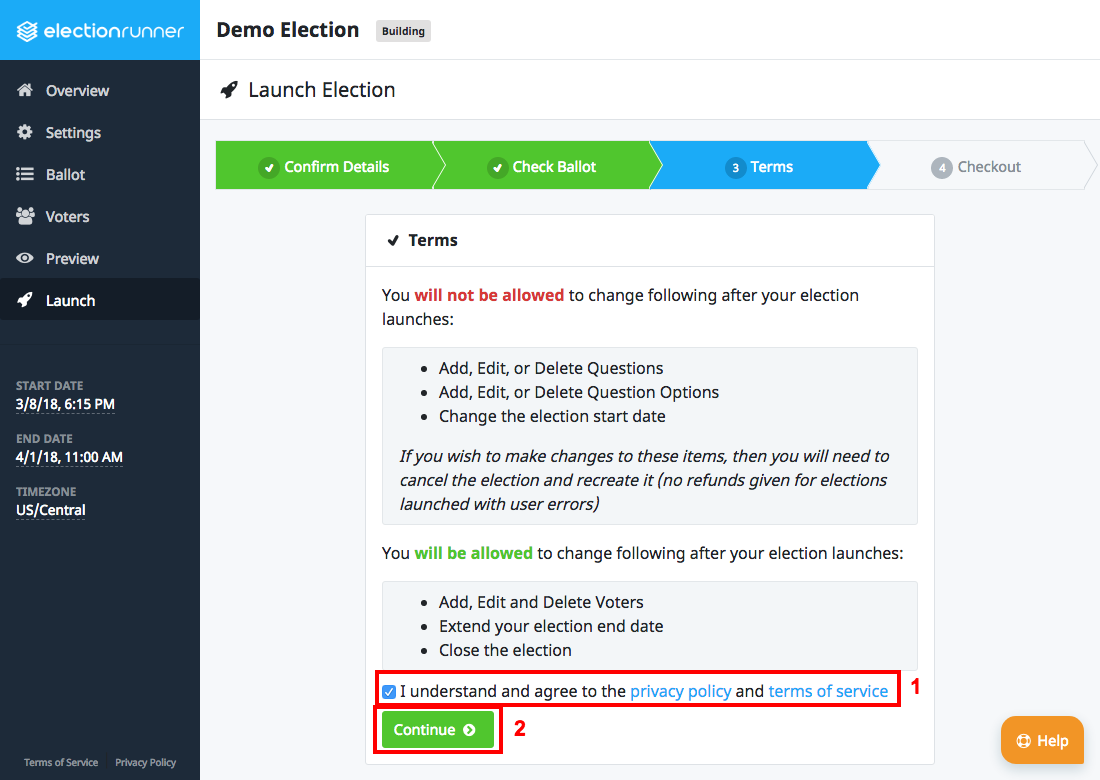
3. Terms of Service
The third step of the launch process requires that the election administrator agrees to Election Runner’s Terms of Service, Privacy Policy, and that it understood which changes can and cannot be made to a running election.
To continue to the final step of the launch process, check the “I understand…” checkbox (1) and click “Continue” (2).
4. Election Checkout
The final step of the launch process is the checkout. This is where the election administrator will provide payment information based on Election Runner’s Pricing.
Pay-Per-Election Election Checkout
For those subscribed to the pay-per-election plan, the election checkout will display the total price of the election and a “Pay by Credit Card” button. Click this button to open a modal with a secure credit card form. 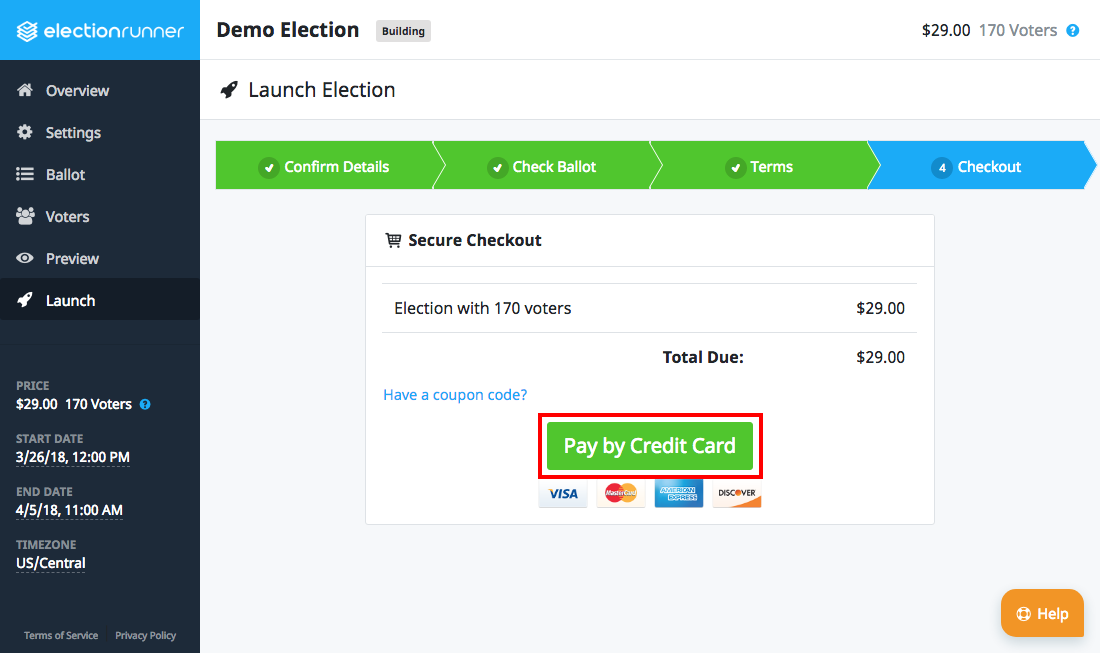
- When the credit card form appears, enter the credit card number.
- Enter the card’s expiration date.
- Enter the card’s CVC.
- Click the “Pay $XX.XX” button to process the payment.
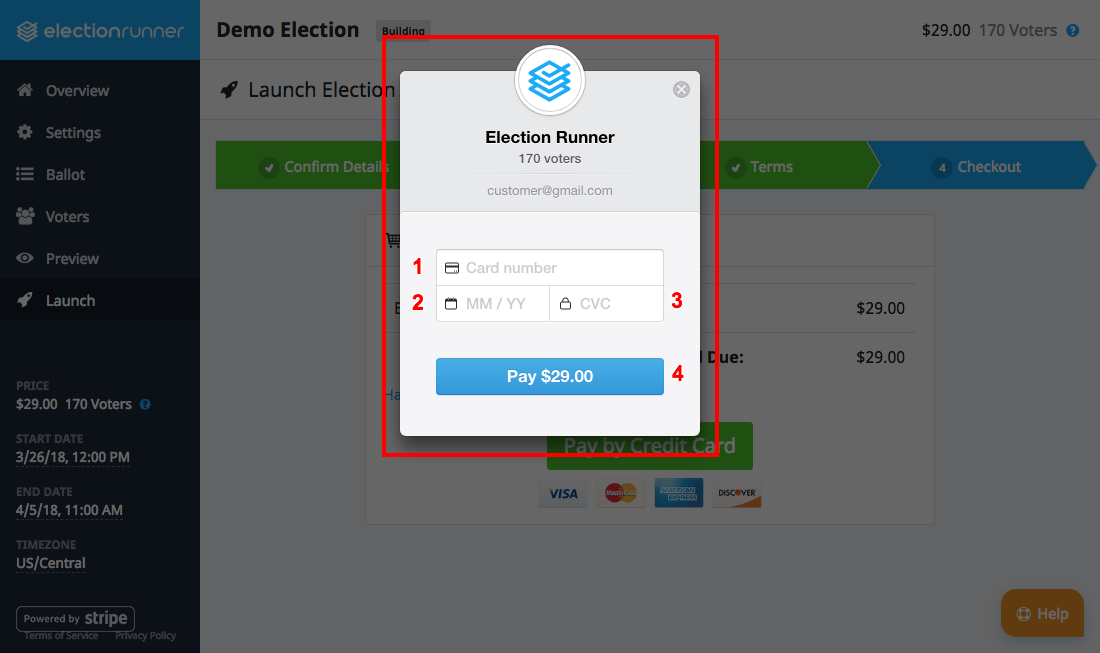
If the payment succeeds, the election will change from the “Building” state to the “Scheduled” state.
Subscription Election Checkout
For those with a subscription, the election checkout will consist of a “Launch Election” button that when clicked will result in the election changing from the “Building” state to the “Scheduled” state.

Additional Notes
- Elections that have a start date in the past will start within 2 minutes of completing the launch process.
- Elections will automatically start on the start date/time in the timezone specified in the election settings.
- There are no refunds given for mistakes that require creating a new election.
Still need help? No problem! Click here to create a new support ticket.